Friday, 28 January 2011

Practice Film 1: Screen grabs

This is the toolbar we used to find our sound effects , backing tracks etc
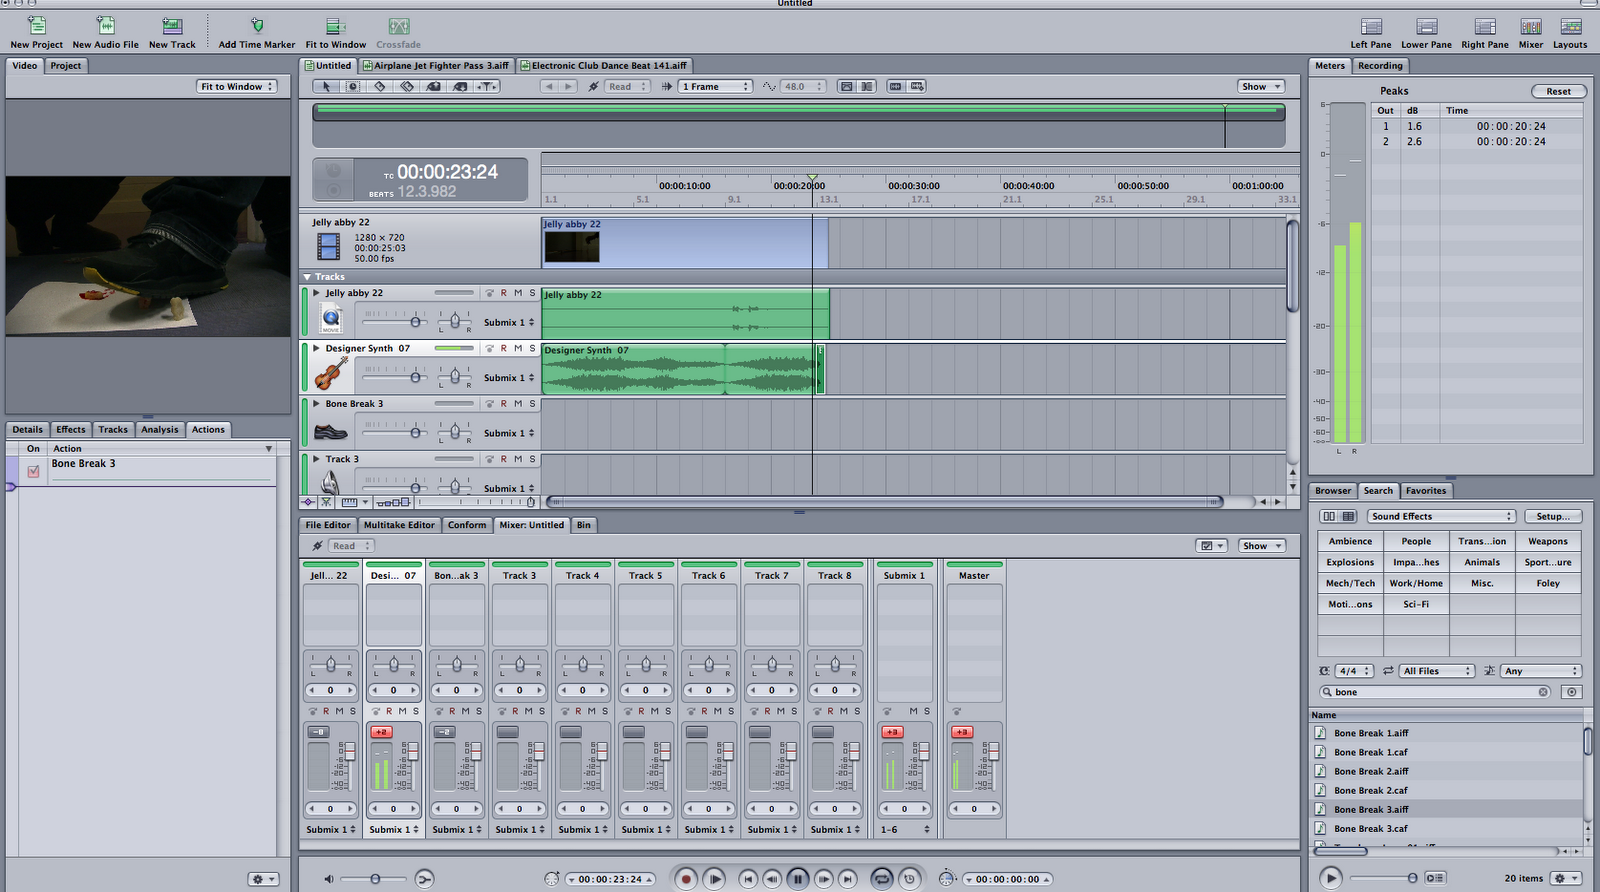
Here we are using Sound for effects for our clip which is on the left of the screen. The bars with green highlights the loops of the effects

Livetype and Sound: SKILLS

Livetype

After we learnt how to used Final Cut Pro we were introduced to Livetype which is a program we will use for creating our title sequence. This program has many features such as creating titles writing on our film with different animations, fades, different font types, colours etc. We were given a short time to play around with the software although I learnt how to create a title position to how I want and change the font colour. I done an example and used the text 'Your Highness' at first it was in a normal font however I changed the font to something 'girly' added pink and positioned it according to my preference. 

Sound

We then used the Sound program which allowed us to add sound effects, accents and motifs. I found that there were plenty of sounds to choose from hand claps, laughters, chilling musical refrains and a variety of genre to choose from. The aim of using this program was to give us some knowledge for when we use it for our final thriller opening. After we experimented the software individually we got together as a group and chose a backing track for our bag swap task. In the end we used a beat from the beginning to the end of the clip which was full of action, tension and pace. Considering our bag swap including plenty of running and moving about this backing track suited our clip. Below is a screen shot of the sounds being applied to clip. 


Introduction to editing: SKILLS

Within lesson we were introduced to editing using a program called Final Cut Pro, which is a program used to edit videos and clips. 


This program enabled us to cut scenes we did not need through the 'in' and 'out' button which allowed us to use the footage we did need and dispose the ones we did not. We had to include a total of 12 shots within our 'bag swap' task, however we done more which allowed us to have a larger variety of footage that worked best. The program had features on it such as fade ins, and fade outs, however we did not use them for our final clip because it was not necessary however, we did play around with it.


The program also enabled us to crop footage we did not need however this meant that the footage that was left was in large pixels which was not, effective in our bag swap scene which is posted below.


Thursday, 27 January 2011

Preliminary exercise- Planning

As a preliminiary match cut exericse, we were given a brief which was to film the following sequence..Making sure to use at least one match cut, an example of shot/reverse shot and showing your understanding of the 180 degree rule.

This is where we had to plan our Prelim exercise to practice using Jelly babies. We had four main jelly babies that represented us as actors. We had a basic outline of a story line and  planned it out as a group. Our ideas came naturally and we were able to incorporate everyone's ideas effectively. We added suspenseful music from Sound Track Pro to just create more suspense and included one line of dialogue. We decided to do this as it was much more suspenseful is there wasn't a huge conversation in the scene.

                  ^My group filming our brief plan using jelly babies^

Take a quick look at our 26 second planning using Jelly babies!
Yellow (Demi)
Black (Elias)
Yellow covered in blood (Mariama
Orange (Sheri)

Livetype and Sound Skills

We learnt to use the 'Livetype' and 'Sound'. Firstly I started to practise using these systems to learn the main functions and purposes that will be essential in the making of our actual real thriller opening. First I used the 'Livetype' program practice how to use lettering to make an effective font for my thriller film opening credits. There were many different fonts to choose from with many effects and animation such as playing cards, flowers, dissolves and fades. It was a good way to experiment with font types and the way in which you can move letters about to form different shapes and styles of words. It makes your work look more creative and exciting especially for thriller films.

Afterwards I was introduced to the 'Sound' called Sound Track Pro, this is where we created the background music for the bag swap that we produced. I was practicing with different sounds and just listened to lots of beats, instrumentals and voice notes. Then i started to look for sounds that were full of tension and also suspenseful. It was very difficult to choose form so many sounds so it took quite a lot of time to go through as many as i could in the limited amount of time. I had to find the right sounds that fitted together to form a good suspenseful sound.

After this, my whole group to start editing the Bag Swap short film that we created. First we added the bag swap video to the 'Sound track pro application' system. It opened in a small screen on the programme so we could put the music  in sync with the film.

Here is where the toolbar to choose which type of sound we wanted in the opening. We choose some gun shot sounds with fast beating background to emphasise when i was running in the bag swap scene.------>

Wednesday, 26 January 2011

The Structure of Thriller Openings

There are three types of basic structures that are followed:

  • a narrative opening with the titles running throughout
 e.g The Shining and The Stepfather

  • a discrete title sequence 
e.g. Se7en and Arlington Road

  • titles over a blank screen, followed by the narrative opening
e.g Donnie Darko and Mesrine


Font Analysis

There are two types of fonts: 


Serif fonts - fonts that have 'flicks' on them. i.e - times new roman - serif is the little extra strokes at the end of every letter
these types of fonts are more traditional and formal


Sans serif fonts - fonts that don't have the 'flick' i.e - arial - sans means without - ''without flick'' fonts.
these fonts are more informal, 'friendly' and modern.


FONT ANALYSIS - PEARL HARBOR


  • PALATINO font was used
  • bold, capital letters make it stand out
  • serif font - formal, old fashioned font - connotes history
  • ''tall letters'' - regimental
  • capital letters = army


FONT ANALYSIS - ROCKY


  • Franklin Gothic Heavy font was used
  • big, bold, broad
  • sans serif font
  • punches out
  • informal - plain but concise
  • simple font = simple guy